Hollowing out your object means that
- less material needs to be printed
- the resulting parts will be lighter
- the price is often lower seeing that pricing for most 3D printing materials is volume-based
- for some materials deformation or discoloration can be avoided (e.g. in Laser Sintering)
In order to hollow out a model in the 3D modeling software that you are using, keep the following steps in mind:
- Define a wall thickness that is strong enough for your model not to break (see our material design guides)
- Create a hollow model
- Add ‘escape holes’ to your model for powder or resin removal
1. Define a wall thickness
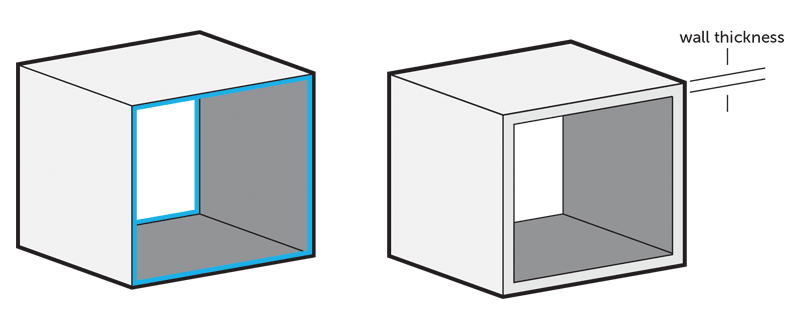
In 3D printing, wall thickness refers to the distance between one surface of your model and its opposite sheer surface. Wall thickness is defined as the minimum thickness your model should have at any time. It’s important that every surface of your 3D model has been assigned a wall thickness.
When using your 3D modeling software it's possible to design a surface without a wall thickness. However, 3D printers need the information about how thick you intend the wall of your object to be. Many printing problems can be traced back to wall thickness issues. The minimum printable wall thickness primarily depends on the material you choose. Other factors such as the alignment, size, and overall design of your 3D model, can also influence the recommended minimum wall thickness.
Pushing the wall thickness to the minimum might seem like a way to save money. However, making walls too thin can make a model too fragile and might cause parts of it to break off.
Before you decide to 3D print (or even design your model), you should know the basic guidelines for your printing material of choice. You can find specific information about the required wall thickness for each material in our material design guides.
2. Create a hollow model
Each 3D modeling software works differently, so hollowing a 3D model is easier in some programs than in others.
Let’s take a look at some examples (from free software):
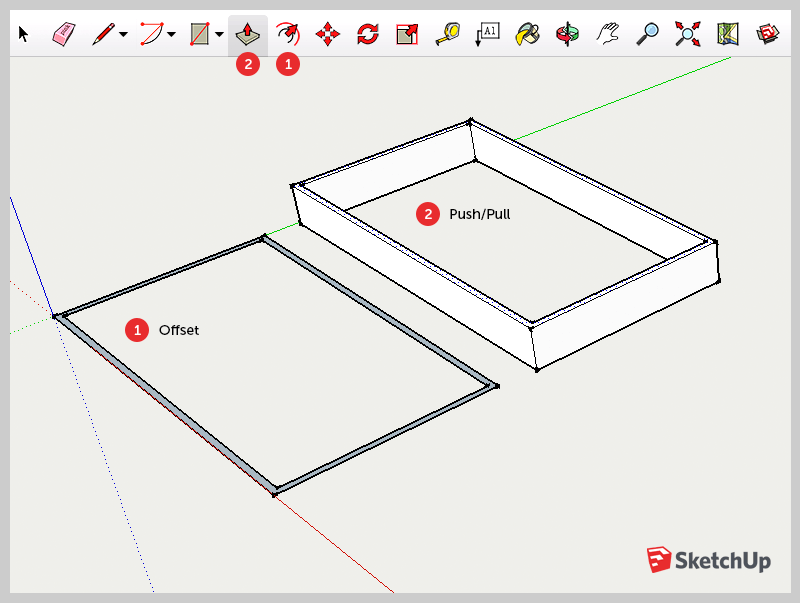
- In SketchUp, hollowing is a bit complicated. An easy way is to start with a 2-dimensional rectangle and use the ‘offset’ function. This will create a rectangle within the rectangle. Delete this space and you’ll have an empty space in your rectangle. You can then ‘pull’ this 2D shape into a 3D object. In a final step, you can add ‘walls’ at the top and bottom of the design.
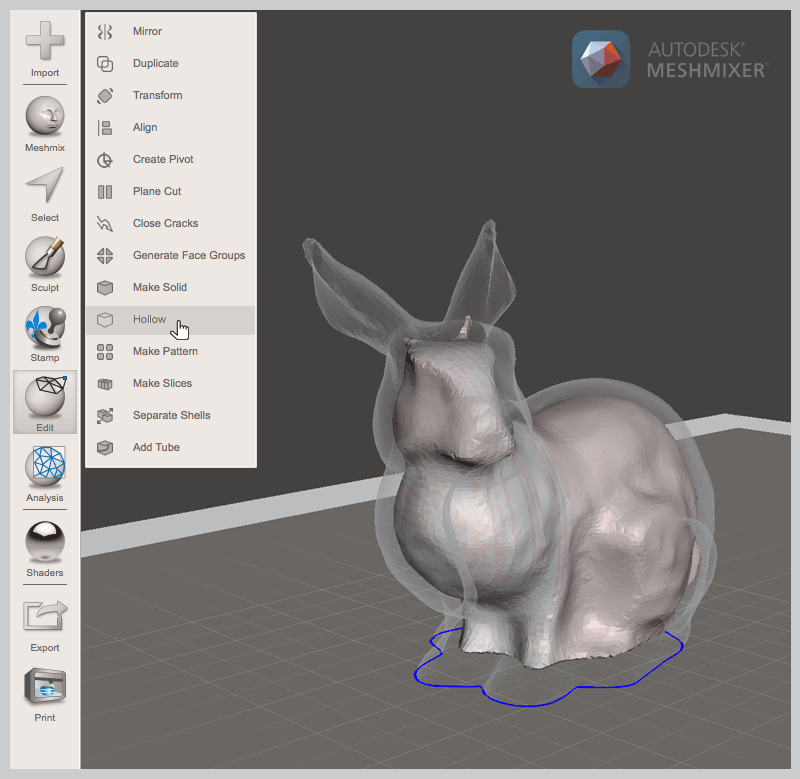
-
Autodesk Meshmixer has probably the easiest option to hollow out a model. Insert your 3D file, select ‘edit’ and ‘hollow’ and you will have immediate results.
3. Escape holes
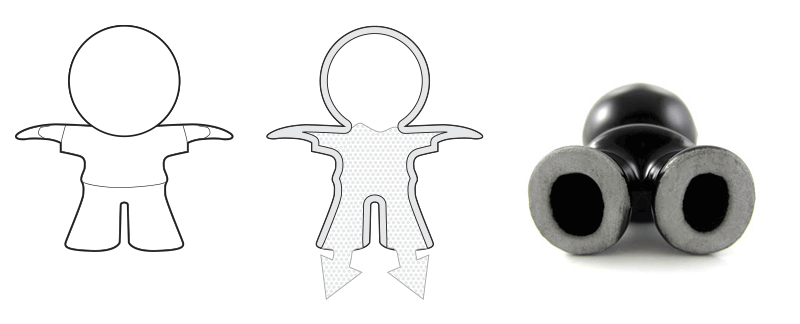
3D prints are created layer by layer which means that material will get trapped inside the object. We recommend foreseeing escape holes are recommended for getting ‘trapped’ 3D printing material out of your 3D print.
- For powder-based 3D printing, we typically use pressurized air for cleaning the excess powder out.
- For resin-based 3D printing, escape holes are used to drain out excess resin and level out the pressure inside and outside during the 3D printing process.
- For lost wax 3D printing & casting, escape holes are needed to get rid of the unprinted wax resin and to make sure that the casting plaster is sufficiently supported. Without this, your model cannot be cast properly.
Now the questions remain how many escape holes a print needs and how big they need to be. And once again there is no universal answer to this: it all depends on the 3D printing material and the size of your print.
We recommend more than two escape holes for precious metal prints. An escape hole with a diameter of at least 1.5 mm will be fine for gold and silver prints. Once again, taking a look at the individual design guides will provide you with all the answers.
How to add escape holes really depends on your software but the idea is often the same: create a cylinder at the bottom of your model and extrude or subtract from its wall. Meshmixer’s hollowing tools even come with a function that lets you create escape holes automatically.