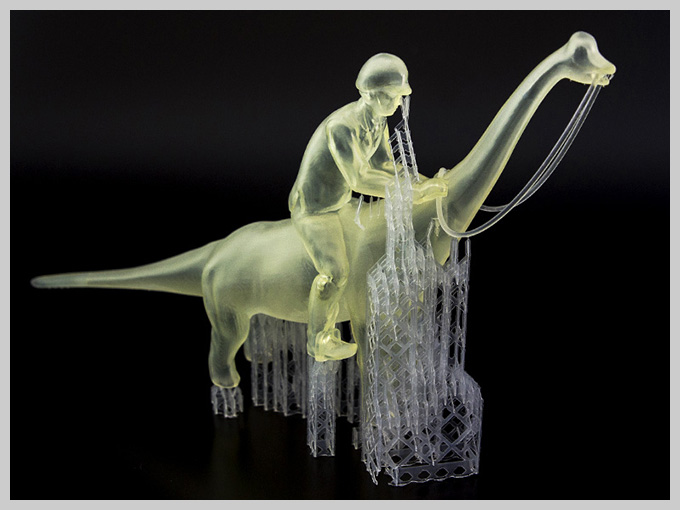
In order to make your standard resin prints cheaper, you can order them “with support structure”. It means less manual work for us, and low-budget prints for you. If you don’t feel comfortable to remove the support yourself, you can still choose the option “without support structure”.
General tips for removing 3D printed support structure
- First of all a general reminder: Work slowly and cautiously when removing support structure. Thin and detailed Standard Resin parts are much more brittle than thick and solid ABS parts; caution and precision are key.
- Before you work on your main print, make sure to start with a test piece or with the least visual part of your model.
- The support structure is automatically generated by us with high-end software that designs and attaches those lightweight structures to your print. The support is typically connected to the print with very thin connection parts. It's advised to cut off the support very close to the actual print. This will make sanding the part much easier.
How to remove support structure from 3D prints
- There are tons of blades and tools to choose from. Which tool works best for you depends on many variables such as the shape and size of the print, the material, and your personal preferences. It often makes sense to use a combination of these blades. The most common and most popular tools that our community uses are:
-
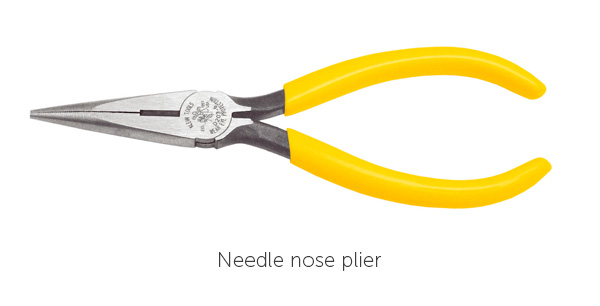
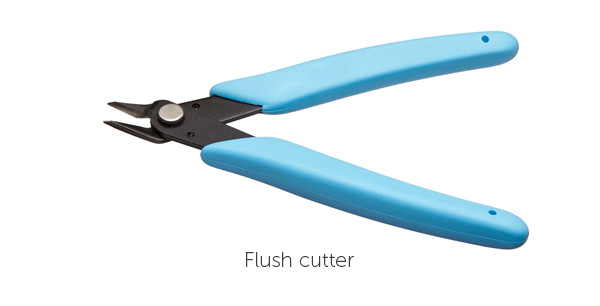
Needle nose pliers are typically used for support material that can be broken away, rather than cut away. So while this is a great tool to work relatively fast, it is less suitable for parts that need precise control. A flush cutter might be a good alternative since it combines strength and precision.
-
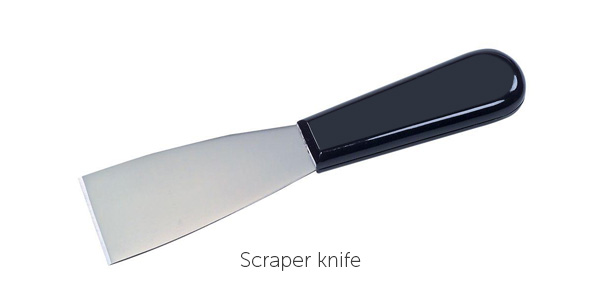
Putty-type knives, scraper knives, or pallet knives with sharpened edges are sometimes used for removing support as well. They are most often used for large-scale models without small details. So it might only make sense to remove the rough and outer parts of the support with these kinds of knives.
-
Xacto knives are a popular choice and give you lots of precision. With these, you can cleanly cut away the small elements that connect support structure and objects in standard resin. The only downside is that they are really sharp and a single slip can result in a sliced finger or a scratch in your 3D print.

-
Needle nose pliers are typically used for support material that can be broken away, rather than cut away. So while this is a great tool to work relatively fast, it is less suitable for parts that need precise control. A flush cutter might be a good alternative since it combines strength and precision.
- Some people like heating the blade or even the model in order to make it easier to slice off the support structure since it will be much softer. Typically, a tiny butane torch is used for this. If you want to go for this option, make sure to be very careful, for the sake of both yourself and your model.
After the cut: Sanding off the surface of the 3D print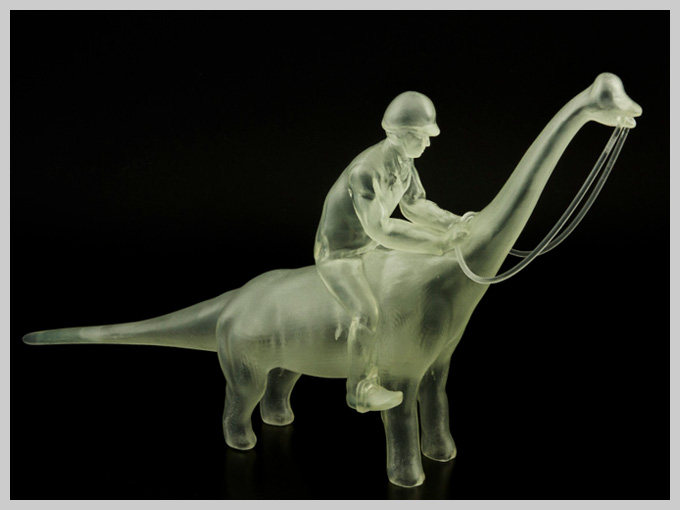
- Once the cutting is done, you probably want to get rid of the small remaining support elements and marks. This is why the next step is all about polishing your model. For this, sanding with high grit sandpaper between 220 and 12000 can work wonders. While using sandpaper will make your part smoother and eliminate the last remaining support parts, it will change the color of the print. Basically, it will be possible to see which parts of the print have been sanded. This is why it makes sense to color the print afterward (see our painting tutorial).
- Some users even go for a small drill-like tool such as a Dremel. These handheld grinders, with a variety of bits and attachments, can smoothen parts. For standard resin, we would suggest against using them, however. They are simply too fast and powerful. They produce heat that can deform the part and offer too little control for delicate details.