For creating parts in gold, silver, bronze, brass, and copper, we use lost-wax printing and casting. This technology builds upon modern 3D printing technology as well as traditional metal casting.
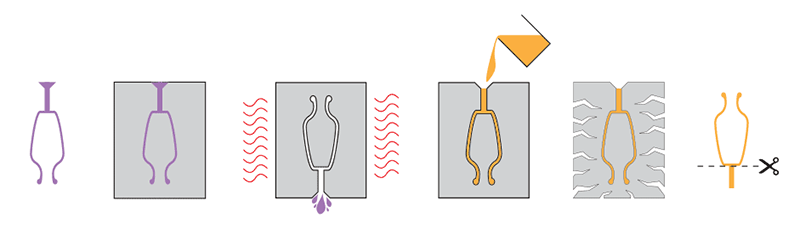
The process starts with 3D printing your model in wax. This step is a type of stereolithography that uses a wax-like resin. Support structures are printed along with the model to make sure it doesn’t fall apart. These support structures are automatically generated and manually removed after the printing process. Next, one or more wax sprues will be attached to your model. Then your model will be attached by the sprue to a wax "tree", together with several other models. The tree is then placed in a flask and covered in a fine plaster. When the plaster solidifies, it forms the mold for casting the metal. The plaster mold is then put in an oven and heated for several hours to a point where the wax is completely burned out.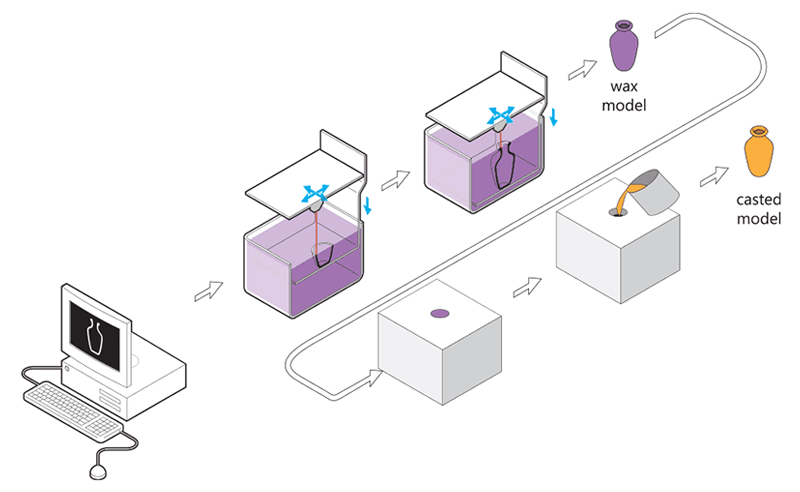
Then, molten metal is poured in to fill the cavities left by the wax. Once the metal has cooled and solidified, the plaster mold is broken and the metal models are removed by hand. Finally, your model is filed and sanded to get rid of the sprues. It will be sanded, polished or sandblasted to create the finish you desire.
 The upside of casting your model is that the final product will have the best quality: surfaces will be smooth, and the strength, feel, and look of precious metals (e.g. a silver ring or a gold pendant) is exactly what you would expect.
Unfortunately, this also means that complicated designs such as a “ball within a ball” or links of chains cannot be made with this process.